

- Tharja Fire Emblem Guide - August 5, 2022
- Shamir Fire Emblem Guide - July 21, 2022
- Leonie Fire Emblem Guide - July 19, 2022
Intro
I am a long-term fan of Fire Emblem, but my first game was the Sacred Stones. I have lost count of how many times I played the Eighth game in the series. Over the years, my love for the Sacred Stones has not changed, though there are some elements of the GBA classic that I do not enjoy. For example, grinding in the Tower of Valni or random encounters are not very entertaining to me. For that reason, this guide is written under the assumption that you play on the highest difficulty and do not spend any time grinding in the tower. After all, because there is an unlimited amount of experience to gain in the Sacred Stones, you do not really need a guide for L’Arachel if you plan on just grinding to the maximum level in the tower before playing through the game.
L’Arachel has appeared in a few Fire Emblem titles over the years. Her first appearance in the Sacred Stones is the main game in which she appears, but she was also in Awakening through Nintendo’s SpotPass function and currently appears in Fire Emblem Heroes. Despite her game of origin being released back in 2004 (In Japan) and 2005 (In North America), L’Arachel has remained a famous healer character in the Fire Emblem fandom. This is likely due to her charming personality and the iconic memes that have been created. One of the most notable L’Arachel memes originates from her B Support conversation with Prince Innes where she said, “If I were not a holy woman, I would beat you senseless.”
Key Info Up Front
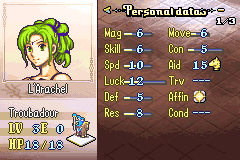
- Bases:
- Level – 3
- Max HP – 18
- Magic – 6
- Skill – 6
- Speed – 10
- Luck – 12
- Defense – 5
- Resistance – 8
- Movement – 6
- Constitution – 5
- Affinity: Light (Mainly increases hit and crit rates along with some increase to attack and defense for supports)
- Base Growth Rates: HP – 45%, Mag – 50%, Skill – 45%, Spd – 45%, Lck – 65%, Def – 15%, Res – 50% (Her Magic and Speed growths are a little higher in the Japanese version of the game.)
L’Arachel joins the party relatively late in the game. She is the last unpromoted user of staves to join the team, which usually means that Moulder, Natasha, or a promoted Artur will be better options. Obviously, grinding in the tower or with random encounters on the map makes any and every unit viable. However, if you are trying to optimize for a low turn count playthrough, L’Arachel is not a very good option.
Unfortunately, she just joins too late and requires too much exp to keep up with the other units. However, if turn counts are not a concern, you do not need to grind in the tower to use L’Arachel and allow her impressive base stats and solid growth rates to shine. L’Arachel is a fantastic unit worth training and promoting to use during a playthrough. Depending on your playstyle, she might not be the best possible option, even though she is probably one of the best healers in the game.
Story
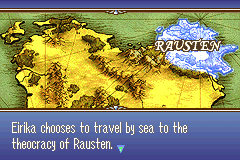
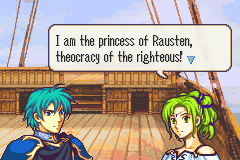
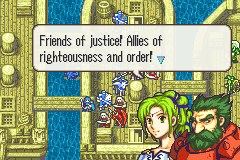
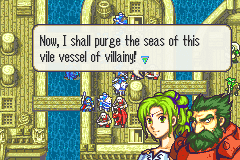
L’Arachel, the princess of the Rausten theocracy, is a prominent figure on the continent of Magvel and within the storyline of the Sacred Stones. She embarks on a journey across the continent to defeat monsters and rid the world of evil, accompanied by her close ally Dozla and a “hired” rogue, Rennac.
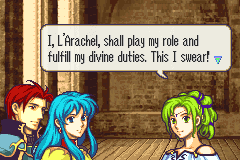
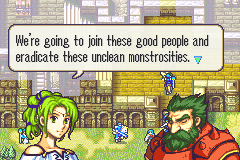
It is not really appropriate to say “hired” of course, since L’Arachel does not actually pay Rennac. She is of the firm belief that doing what is right should be its own reward and payment is unnecessary. This is likely due to her wealthy upbringing enabling her to live a life free from want or strife. Despite being a little out of touch and at times overly self-righteous, L’Arachel is earnest in her desire to help others and work toward the good of all.
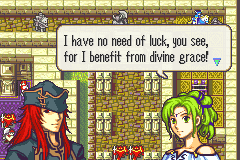
Her boisterous and enthusiastic personality differentiates L’Arachel from the other lord characters in the Sacred Stones who have more relaxed demeanors. Though not explicitly confirmed, it is strongly implied that L’Arachel also benefits from some kind of divine cosmic protection.
She believes that she has no need for luck as she will prevail through faith. In her support conversations with Joshua, she manages to win every gambling game that he plays with her, despite having no experience with the activity and Joshua actively attempting to fix the games in his own favor. This ability does not have bearing on her functionality as a unit, but it seems like in the context of the world, L’Arachel succeeds and remains safe due in part to divine power.
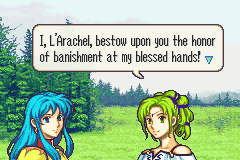
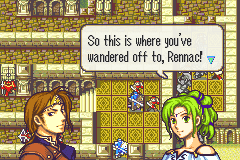
L’Arachel first appears during Chapter 4 of the Sacred Stones. When Eirika and her allies encounter monsters in Za’Ha woods, L’Arachel, Dozla, and Rennac appear on the ridge. Though L’Arachel and Dozla enthusiastically want to descend down the cliffside and ride to the heroes’ aid, Rennac suggests they find a safer path around that could not result in injuries. At the end of the chapter, L’Arachel accidentally lets the truth of her identity slip out before leaving. She appears later on in both the Eirika and Ephraim routes during Chapter 11 as a recruitable unit.
Class Description
The Troubadour class is an excellent healer class and a common recurring class within the Fire Emblem series since their first appearance in Geneology of the Holy War. Troubadours are horse-mounted stave users who provide support to other units using magic. Ever since the GameBoy era of games, they were not capable of wielding weapons, though.
In the Sacred Stones, only staves can be equipped for L’Arachel while she is a Troubadour. Be careful to keep her safely out of harm’s way and behind your other units, at least until she has been promoted and gains the ability to use some kind of tome for combat. While they are not a combat-oriented class, the value that a Troubadour brings to your units should not be underestimated.
Class Promotions
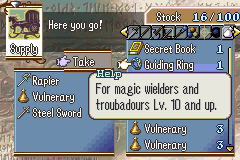
Getting L’Arachel ready to promote using a Guiding Ring requires a lot of healing. The optimal way of getting L’Arachel leveled up depends on which route you have chosen. It is much easier to level her up and promote her in Eirika’s route than in Ephraim’s. Whether you intend to use L’Arachel or not, she is always worth keeping alive in Chapter 11 of either route if only for her items. Her starting items are a Mend Staff, an Elixer, and a White Gem that sells for 10,000G (Only on Ephraim’s route) or a Torch (Only on Eirika’s route). If you are willing to take the time to level her up, L’Arachel is worth promoting. For the sake of comparison, I early-promoted L’Arachel and Moulder for a side-by-side view of their stats as promoted classes.
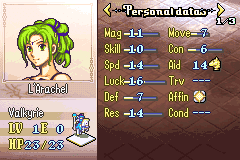
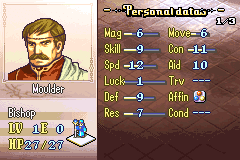
Moulder is not bad, but L’Arachel almost completely outclasses him. With her superior mobility and better stats for combat with tomes, I would choose L’Arachel over other options any time that I have the choice. I generally prefer Valkyrie over Mage Knight for L’Arachel.
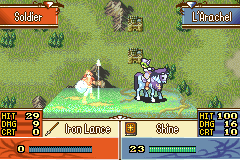
The stat bonuses are not particularly different, but there are plenty of other units who are really good at using anima magic tomes in the Sacred Stones. L’Arachel can shine as a powerful light-magic user. Once promoted, I find that she easily holds her own in combat. After I promoted her to Valkyrie in Eirika’s route, she was able to one-round most of the regular unpromoted enemy units.
So, how do you change L’Arachel from a simple Troubadour fulfilling her support role into a powerhouse that dishes out healing and destruction in equal measure? I tried to find optimal methods in both of the game’s routes. If your goal is to get L’Arachel all the way to Level 20 before promoting her, that will take some serious effort and more grinding than I am willing to do. Of course, if you are that dedicated to L’Arachel’s growth, your results will probably be even better.
Overall Playstyle
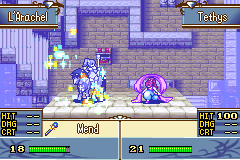
L’Arachel primarily fulfills the healer and support role. She will probably spend most of her time outside of enemy ranges, safely behind your other units and providing support. I find that her affinity bonuses are useful in combination with Joshua. Since both of them grant crit rate bonuses, building support between L’Arachel and Joshua can help Joshua crit more reliably.
In addition, a powerful foe could first be weakened from 2 range by L’Arachel before Joshua moves into 1 range to efficiently finish them off. L’Arachel also synergizes well with Tethys. The only thing better than one L’Arachel would be two of her, right? By having Tethys dance for L’Arachel, you could double her already good healing output every turn.
Character development
Eirika Route
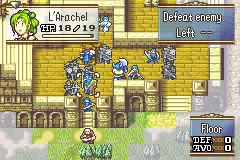
In Chapter 11, she appears inside the building at the bottom center of the map with Dozla. She can be recruited by moving Eirika next to her and selecting the Talk option. She also joins the party as long as she is alive at the end of the chapter. It is not difficult to go ahead and recruit her, though. Once recruited, she can talk to Dozla and recruit him for you. I sent my units down the left side of the map through the trees to reach her and keep her safe behind my units until I had a good opportunity to recruit Dozla with her.
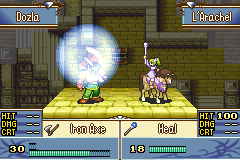
If you followed this route during the chapter, you can trap an enemy with a javelin in a combat loop in the bottom doorway. By placing a unit equipped with a 1-range weapon (I used Joshua) in the doorway, the enemy will not approach close enough for them to retaliate during combat. After the melee unit takes damage from the enemy each round, L’Arachel can heal them to farm some exp.
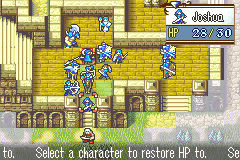
By having Tethys dance for L’Arachel, she can then be moved safely away from the enemy’s range. Each turn, the enemy will only have one possible target to attack: a unit unable to retaliate at 2-range. Therefore, they just keep attacking and dealing damage for L’Arachel to heal every turn. If you do not want to use Tethys for this strategy, you could rescue L’Arachel with another unit and then drop her with another so she is ready to heal every turn either way. The benefit of using Tethys is that she is also able to gain exp from dancing every turn.
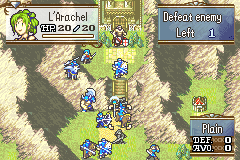
The turns spent on farming exp for L’Arachel can also double as an opportunity to farm support with all of your units and view support conversations when they pop up. There is another good opportunity for this strategy in Chapter 12. Simply place a character at 2-range from the boss with no way to retaliate and keep healing them every turn with L’Arachel. By the end of Chapter 12 in Eirika’s route, I had L’Arachel at Level 10 and ready for promotion whenever needed.
In chapter 14, L’Arachel can be used to recruit Rennac for free on the right side of the map. I recommend positioning units outside the door on the right before opening it. That way, they can all swarm inside and take out the enemies in one turn, while L’Arachel moves up and talks to Rennac before he has a chance to move at all. This method is preferable to paying thousands to recruit him with Eirika.
Ephraim Route
Chapter 11 of Ephraim’s route, the Phantom Ship, is notoriously difficult. I have heard other players claim the best way to get through the map without any character deaths is to just go grind exp in the tower or other encounters. My solution requires a little bit of forethought and planning, but no grinding at all. Far prior to reaching Chapter 11, way back at the start of Ephraim’s route, I selected an elite squad of units I planned to use moving forward.
You may not be able to use all of the characters that you want, but by concentrating exp gains from the preceding levels on a few units, they become strong enough to easily deal with the hordes of enemies in Chapter 11. I used Seth, Franz, Vanessa, Joshua, Forde, and Ephraim. I also used Duessel and Cormag once I recruited them in the chapter prior. I do not think there are particular units that you need to use for Chapter 11, your favorites (if they have been getting concentrated exp) should fair well. I do recommend having both Cormag and Vanessa, though. Fliers are extremely useful and necessary for taking an offensive strategy against the flying enemies in Chapter 11.
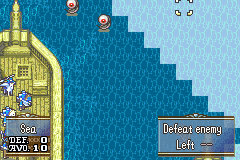
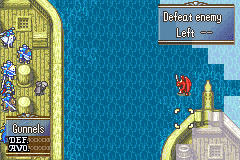
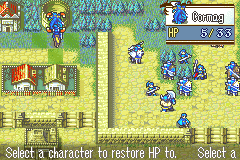
At the start of Chapter 11, I sent Vanessa up to deal with the enemies at the top of the map and Cormag to the right to fight the incoming gargoyle. The two at the bottom are easy enough to defend against at the bottom of the ship. If you do not feel like memorizing the positions of all the enemies on the constantly changing map, I recommend using Colm and a torch to maintain visibility.
Moulder or Natasha can also use a torch stave that is obtainable from the village at the top of the map in Chapter 10. This chapter is all about managing aggression. You have to get rid of enough enemies each turn to safely make your way across to where L’Arachel appears on the right side, but over-extending can get your units killed.
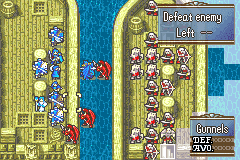
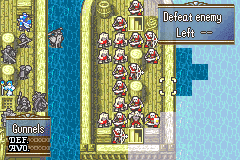
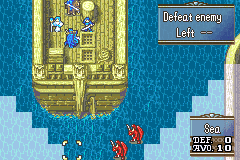
When the phantom ship swoops in, carrying tons of enemies, powerful units are needed to block off the bridges. I usually place units on the enemy’s end of the bridges that appear, but do not board their ship until the following turn (after taking some of the forces out). Taking control of the central ship before L’Arachel’s ship arrives on the right side is important. If you are unable to reach her, she could get swarmed.
Dozla may be strong, but he may not be powerful enough to defend L’Arachel from hordes of monsters on his own. It is best to keep control of the map so that they cannot be overwhelmed before you recruit them. L’Arachel will join the party with Dozla after the chapter ends, but only if she survives. I prefer recruiting her with Ephraim as soon as possible, to benefit from her healing during the chapter and begin the process of leveling her up.
In Chapter 12, there is an arena and a boss that can be used for farming healing exp with L’Arachel in a similar fashion to the strategies for Eirika’s route. I did some arena fights with Cormag, for example, and had L’Arachel heal him after each battle was over. You could use any character that you want to fight in the arena and L’Arachel will be able to get plenty of experience while you also win money and gain exp on the character of your choice. You at least need to improve her staves proficiency to C by the time you reach Chapter 14 so that L’Arachel can use a restore staff.
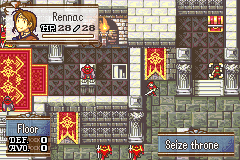
In Chapter 14, Rennac appears on the right top side of the map and slowly makes his way across to the left side. To recruit him for free with L’Arachel, I deployed her on the left side of the map to intercept him and talk when he cuts across. Enemies in Chapter 14 can inflict berserk, silence, and sleep status conditions. These are serious hazards that are remedied easily by L’Arachel using a restore staff to clear the status conditions when her allies are targeted. After clearing the map and reaching the boss, L’Arachel can do more exp farming with the boss by placing an allied unit at 2-range without a way to retaliate, just like the strategies in Eirika’s route. By the end of the chapter, she can be at level 10 and ready to promote as needed, moving forward.
How Your Choice Affects Gameplay
There are a few choices in how you approach L’Arachel as a unit that will affect your playthrough. If you choose to grind for exp, it will be much easier to tap into her maximum potential. If you pick Eirika’s route, it will be much easier for L’Arachel to level up safely without using the tower or random encounters at all.
Regardless of the route that you choose or which promotion option you select for L’Arachel, she can develop into a really powerful unit. Whether or not you choose to use L’Arachel long-term, keeping her alive to recruit her is important. She lets you recruit both Dozla and Rennac for free. So, even if you prefer using other healers in the Sacred Stones, L’Arachel is needed for gaining easy access to the utility Dozla and Rennac can provide.
If you quickly grind enough exp during the chapters following her recruitment, you can promote her by chapter 15 on either route. If you early-promote L’Arachel, she will have immediate value but may not going be one of your best units for the end-game, depending on stat increases you see in her level-ups.
If you are getting unlucky levels with little stat growth, you may want to wait before promoting her to get the best possible results. In the end, her primary function is as a healer. A few bad levels can make some combat units practically unusable, but L’Arachel does not need to be perfect to do well. Besides, it is unlikely that you will see terrible level-ups for her since she has good growth rates. Every time I have used L’Arachel, she has at least been a decent unit.
FAQ
Question: How to recruit L’Arachel and Dozla?
Answer: In Chapter 11 of both Eirika and Ephraim’s routes, L’Arachel can be recruited by talking to her with Eirika or Ephraim, respectively. Once recruited, she can talk to Dozla to recruit him. In addition, L’Arachel will join the player on the adventure as long as she is alive at the end of the chapter.
Of course, I cannot think of a reason why you would want to wait since you can just go ahead and talk to her using the main lord to recruit her right as soon as possible. Also note that if one of your units within her movement range is in need of healing, she might use her turn to move closer and heal them. This could make it a little easier to reach her with Eirika or Ephraim, if you find that it is tricky to reach her without her moving closer on her own.
Question: How to pronounce L’Arachel?
Answer: Fire Emblem characters sometimes have rather unusual names and L’Arachel is probably a perfect example of how the pronunciation could be unclear. The original Japanese katakana of her name from the Japanese version of the game seems to translate to something more like “Rachel”. I think the elegant “L’Arachel” is more interesting, though. Because of the original phonetic sounds of her name when written in Japanese, it could be argued that La-Rachel is the correct way to say the name. Based on French phonetics, the L followed by an apostrophe is “la,” but shortened because “Arachel” starts with a vowel.
So, it could be pronounced: L-ara-chell/L-ara-shell. Unfortunately, because the GameBoy era games did not have voice acting, there is not necessarily an objectively “correct” way to pronounce her name as intended by the creators. If you have trouble saying her name, do not feel bad. It is a common issue with older Fire Emblem titles.
Question: L’Arachel Fire Emblem Heroes versions?
Answer: There are a few versions of L’Arachel that appear as playable units in Fire Emblem Heroes. The regular version of L’Arachel appears as “L’Arachel: Princess of Light” in 3 and 4-star rarities. “L’Arachel: Seeker of Justice” is a younger version of her that appears as a 5-star. “L’Arachel: Harvest Princess” is another special 5-star variation of the character. The different versions are all obtainable and also appear in some chapters and paralogues. If you want to obtain the 5-star versions, keep an eye out for the special seasonal banners in which she appears.
Conclusion
Whether you are doing a challenge run or a casual playthrough of the Sacred Stones, L’Arachel is an excellent choice for your party. Despite joining rather late for her level, she is great at fulfilling her role. I do not feel like L’Arachel is ever a waste of a deployment slot, unlike some characters in the series, who might be a little more trouble than they are worth. Compared directly to other healer units competing for the same role, L’Arachel stands out both in terms of stats/capabilities and her entertaining personality.
For more interesting readings about Fire Emblem check out: